Category

Fashion & Beauty

Comprehensive discussions and expert insights revolving around fashion & beauty trends and best practices.

May 08, 2026 • 127 Reads

Convert Logo for BAi Mirror Embroidery Machine for Precise Stitch Control

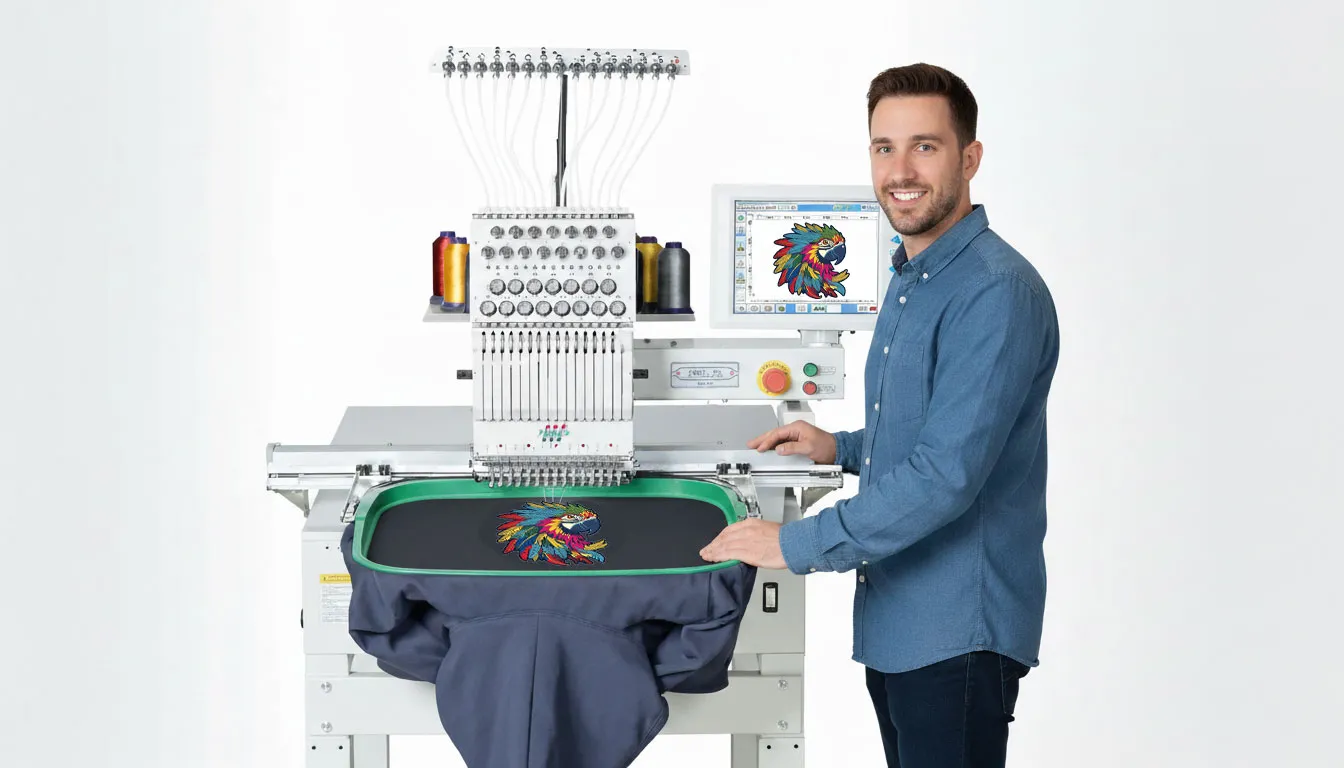
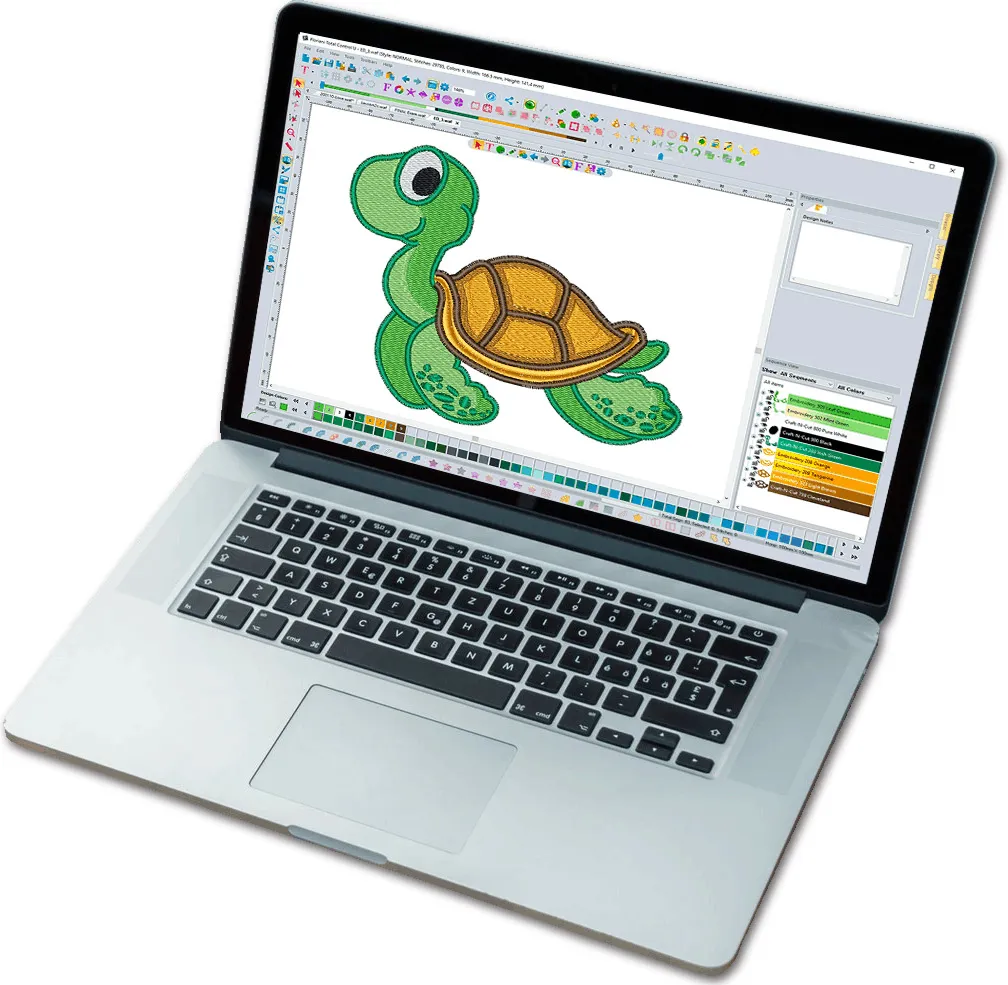
Introduction: Why Your Logo File Makes or Breaks the StitchYou have a crisp logo. You have a BAi Mirror embroidery machine ready to run. But when you hit start, the thread bunches, the fabric puckers, and the design looks nothing like your original artwork. The problem is not the machine. It is the file you fed it. That is why learning to properly Convert Logo for BAi Mirror Embroidery Machine is the difference between a professional patch and a frumpy mess.Embroidery digitizing is a completely different animal than printing or drawing. A logo that looks flawless on paper can stitch out as a tangled disaster if you do not prepare it correctly. The BAi Mirror machine reads stitch files as a series of commands: move here, punch there, change color. If your conversion ignores fabric type, stitch density, or pull compensation, the machine faithfully follows bad instructions. Garbage commands, garbage stitches.Let me walk you through exactly how to convert your logo so every thread lands where it should, every time. No fluff. No confusing jargon. Just practical steps you can use today.Understand What the BAi Mirror Machine Actually NeedsBefore you open any software, you need to know what file format your BAi Mirror model accepts. Most BAi Mirror machines work with .DST, .PES, or .EXP formats. .DST is the safest bet because it is the industry standard for commercial embroidery. Check your manual, but if you are unsure, choose .DST.Your machine does not care about pretty colors on a screen. It cares about stitch type (running, satin, or fill), stitch angle, density (how close stitches sit to each other), and underlay (the foundation stitches that stop fabric from shifting). A proper conversion gives the machine these four things in a language it understands.Also, know your hoop size limitation. If your logo is 8 inches wide but your BAi Mirror only hoops 6 inches, you either resize or split the design. Always check this before spending hours on a conversion that will not fit.Step 1: Clean Up Your Original Logo ArtworkYou cannot convert garbage into gold. Start with the cleanest version of your logo. Vector files like .AI, .EPS, or .SVG work best because they have sharp edges. If you only have a JPEG or PNG, open it in a program like Inkscape or Illustrator and manually trace over it with the pen tool. Remove drop shadows, gradients, and transparency. Embroidery machines do not understand those effects. They understand solid shapes.Simplify your logo aggressively. Every tiny detail less than 2mm wide becomes a thread break nightmare. For example, thin text or small stars will stitch as blobs. Either enlarge those details or remove them entirely. Ask yourself: does this tiny element survive at 1.5mm wide with thread? If no, cut it.Save your cleaned artwork as a high-contrast black and white image. Black becomes stitches. White becomes no stitches. This binary map makes the digitizing software's job trivial.Step 2: Choose the Right Digitizing Software for BAi MirrorYou have options depending on your budget and skill level. Wilcom Embroidery Studio is the professional gold standard, but it costs as much as a used car. Hatch Embroidery (made by Wilcom) offers a more affordable $1,000 range. For beginners, InkStitch (a free plugin for Inkscape) works shockingly well with BAi Mirror machines once you learn its quirks.I recommend starting with Hatch if you plan to convert multiple logos. It includes auto-digitizing for simple shapes, plus manual tools for fine control. The free trial lasts 30 days, which is plenty of time to test your logo conversion before buying.Avoid cheap online converters that promise one-click digitizing. They ignore fabric type, produce backwards densities, and usually stitch out looking like tangled fishing line. You get what you pay for.Step 3: Set Your Hoop, Fabric, and Thread Type FirstBefore you convert a single stitch, tell your software what fabric you are sewing onto. Here is why this matters so much:T-shirts and knits: These fabrics stretch. Set higher pull compensation (0.4 to 0.6mm) so stitches do not shrink inward. Use a light underlay.Caps and structured fabrics: These are rigid. Use lower pull compensation (0.2 to 0.3mm). Add a heavier underlay to stop needle deflection.Towels or fleece: These fabrics eat thread. Increase stitch density by 15 to 20 percent. Use a double underlay.For thread type, standard 40-weight polyester thread works for most logos. If your logo uses very fine text, switch to 60-weight thread in your software settings. The BAi Mirror handles both, but you must tell the conversion software which needle and thread you plan to use.Step 4: Assign Stitch Types the Smart WayNow the real conversion begins. Most digitizing software lets you trace your logo and assign different stitch types to different areas.Use satin stitches for borders, text, and any shape narrower than 8mm. Satin stitches lay flat side-by-side like a zipper. They look clean and professional. Set your satin stitch angle perpendicular to the shape’s longest direction. For a vertical letter like "I", use horizontal satin stitches. For a horizontal line, use vertical satin stitches. This simple rule prevents thread gaps.Use fill stitches (also called tatami stitches) for large solid areas wider than 8mm. Fill stitches zigzag back and forth. Keep density between 0.35mm and 0.45mm for most fabrics. Too dense, and the fabric puckers. Too sparse, and the background shows through. For a standard cotton polo, 0.4mm density works beautifully.Use running stitches for fine details, thin lines, and underlay. Running stitches are just single straight stitches. Keep running stitch length at 1.5mm to 2.5mm. Shorter than that, and the thread frays. Longer than that, and the stitch snags on everything.Step 5: Add Pull Compensation Before You FinalizeHere is the secret that separates amateur conversions from pro-level ones. When a needle punches into fabric, it pushes fibers aside. Those fibers spring back slightly after the stitch, making your design shrink by about 0.3mm to 0.5mm per side. Pull compensation adds width to your shapes so that after the push-and-pull, they end up the correct size.In your software, look for pull compensation settings. For medium-weight cotton, add 0.3mm outward on all satin columns and fill edges. For stretchy knits, add 0.5mm. For caps, 0.2mm. This tiny adjustment stops your logo from looking skinny and distorted after hooping.Step 6: Simulate the Stitch-Out Before You SewEvery decent digitizing software includes a stitch simulator. Run it. Watch the needle path. Look for long jumps where the machine moves across empty space without stitching. Those jumps create loose threads on the back of your garment. Manually trim those jump stitches or add tie-in/tie-out stitches to lock them.Check your thread colors. The BAi Mirror reads color change commands automatically, but only if you assigned unique colors to each thread change. Assign bright, distinct colors in your software (red for first color, blue for second, yellow for third). The machine stops and beeps at each color change, waiting for you to rethread.Finally, check for stitch clumping. If your simulator shows stitches landing on top of each other in the exact same spot, reduce your density slightly. Too many stitches in one hole shreds the fabric and breaks needles.Step 7: Export and Test on Scrap FabricExport your converted file as .DST or whatever format your BAi Mirror needs. Name the file clearly without special characters (no "Logo#2@Final. dst" — that confuses some machines). Now hoop a piece of scrap fabric identical to your final garment. Run the design. Watch closely.Does the fabric ripple or pucker? Your density is too high or your pull compensation is too low. Does thread keep breaking? Your stitch length is too short or your angles are too steep. Are there gaps between colors? Increase pull compensation next time. Write down every issue. Then go back to your software, tweak one setting at a time, and run another test. It usually takes two or three test sew-outs to dial in a new logo perfectly.Conclusion: Master the Conversion, Master the MachineConverting a logo for the BAi Mirror is not magic. It is a repeatable process: clean artwork, proper fabric settings, smart stitch assignments, honest pull compensation, and real-world testing. Rush any of these steps, and your machine will punish you with thread nests and misaligned patterns. Do them right, and you will crank out crisp, durable logos that look factory-made.The best part? Once you build a library of tested conversions for different fabrics, every future logo gets faster. You will know that cotton polos need 0.4mm pull compensation and 0.4mm density. You will know that caps need a heavier underlay. That knowledge turns the BAi Mirror from a frustrating puzzle into a reliable workhorse.So grab that logo. Fire up your digitizing software. Walk through these steps one by one. And when you hit start on the machine, watch those perfect stitches fall exactly where you told them to. That feeling never gets old.

D
Digitizing Buddy
May 08, 2026 • 140 Reads

Sp5der Hoodie for Everyday Fashion Guide

The Sp5der Hoodie has become a regular part of daily clothing choices for many people who prefer relaxed and practical outfits. It is often seen in casual environments such as streets, campuses, travel routines, and home wear. What makes it relevant in everyday fashion is not only its appearance but also how it fits into different lifestyles without feeling out of place.Everyday fashion is about clothing that supports movement, comfort, and personal expression while still remaining appropriate for multiple settings. The Sp5der Hoodie fits into this category because it works well with simple clothing combinations and does not require complex styling to look presentable. It can be worn by people of different age groups who prefer easygoing clothing that still carries a sense of personal identity.This article explains how the Sp5der Hoodie fits into daily use, what makes it practical, and how it can be part of regular outfit planning.Understanding Sp5der Hoodie in Daily WearThe sp5der hoodie is designed as a casual upper garment that can be worn throughout the day. In everyday fashion, clothing must support repeated use, and this hoodie meets that requirement through its structure and usability.It is commonly used in informal situations such as going outside for errands, meeting friends, attending classes, or spending time in relaxed environments. The main reason it works well in these situations is its balance between comfort and appearance.People often choose hoodies for daily wear because they reduce the need for complicated outfit planning. The Sp5der Hoodie serves this purpose by working as a single piece that can be paired with basic bottoms like denim, joggers, or cotton trousers without difficulty.Fabric and Comfort AspectsOne of the key parts of everyday clothing is fabric quality. The Sp5der Hoodie is generally made with materials that support long hours of wear. Soft inner lining and breathable outer fabric help in maintaining comfort during daily movement.Comfort in clothing is not only about softness but also about how it reacts to body movement. The hoodie structure allows free motion in arms and shoulders, which is important for people who spend a lot of time outside or are constantly active.In daily fashion use, fabric durability is also important. Regular washing and repeated use should not quickly damage the material. The Sp5der Hoodie is often selected for this reason, as it tends to maintain shape and texture over time when cared for properly.Fit and Movement ConsiderationsFit plays a major role in how clothing is used every day. The Sp5der Hoodie usually comes in relaxed fitting patterns, allowing space around the upper body. This helps in movement without restriction.A good everyday hoodie should not feel tight during walking, sitting, or light physical activity. The structure of this hoodie supports that requirement by offering flexibility in shoulder and chest areas.Sleeve length and hood placement also matter in daily wear. Sleeves that stay in place and a hood that sits properly add to practical use, especially in changing weather conditions.Color Choices and Outfit CoordinationDaily fashion depends heavily on how clothing items match with each other. The sp5der hoodie is often chosen in colors that work well with basic wardrobe pieces.Neutral tones such as black, grey, and white are commonly used in everyday outfits because they pair easily with different bottoms. Some variations also include brighter tones, which can be used to bring attention to the upper wear without overwhelming the overall look.When combining outfits, simplicity often works better for daily use. A hoodie like this can be paired with denim for a regular day outside or with joggers for a more relaxed home based routine.The goal in everyday coordination is consistency and ease rather than complex matching rules.Seasonal Use in Daily RoutineEveryday fashion changes with weather conditions. The Sp5der Hoodie is often used in multiple seasons due to its layered structure.During cooler months, it can be worn as a main upper layer. In moderate weather, it can be paired with lighter clothing underneath without causing discomfort. In colder conditions, it can be added under jackets for extra warmth.This flexibility allows it to remain part of daily clothing rotation throughout the year instead of being limited to one season.Work, School, and Casual SettingsDaily fashion is different for each environment, but casual clothing is widely accepted in many non formal settings.In school environments, hoodies are commonly worn because they are easy to maintain and comfortable for long hours. In casual work environments where dress codes are relaxed, they can also be part of daily clothing choices.For casual social settings, the Sp5der Hoodie provides a simple option that does not require additional layering or styling effort. It fits well into environments where comfort is more important than formal appearance.Care and Maintenance PracticesClothing used daily must be easy to maintain. The Sp5der Hoodie requires regular but simple care to keep it in good condition.Washing with similar colors helps maintain fabric consistency. Avoiding harsh cleaning methods can also extend its usable life. Proper drying techniques, such as air drying, help prevent shrinking or fabric damage.Storage also plays a role. Folding it properly instead of hanging it for long periods helps maintain its shape.Consistent care ensures that it remains suitable for repeated everyday use without losing structure.Common Mistakes in Everyday StylingOne common mistake in daily hoodie use is overcomplicating the outfit. The Sp5der Hoodie works best with simple combinations rather than layered or overly detailed clothing setups.Another mistake is choosing improper sizing. A size that is too tight can reduce comfort, while an overly large size may affect movement and appearance balance.Color mismatch is also a frequent issue. Using too many strong colors in one outfit can reduce visual balance, especially in daily wear where simplicity works better.Understanding these points helps in making better clothing choices for regular use.Why Sp5der Hoodie Works in Daily WardrobeThe Sp5der Hoodie fits into everyday fashion because it combines practicality with simple wearability. It does not require special occasions or complex styling to be used effectively.Its structure supports long hours of wear, and its adaptability allows it to be used in different environments. From home routines to outdoor activities, it remains consistent in performance.Another reason it works in daily wardrobes is its ability to blend with common clothing items. Most people already own basic pieces like denim or casual trousers, making it easy to integrate into existing outfits.It also supports personal expression in a subtle way without making the outfit feel forced or overly designed.Final ThoughtsEveryday fashion is built on clothing that supports comfort, movement, and practicality. The Sp5der Hoodie fits into this category by offering reliable daily use without unnecessary complexity.It works across different environments, seasons, and outfit combinations, making it a regular choice for people who prefer simple clothing routines. With proper care and thoughtful pairing, it can remain part of a daily wardrobe for a long time.FAQsWhat makes the Sp5der Hoodie suitable for daily wearIt offers comfort, flexible movement, and easy pairing with basic clothing, making it practical for regular use.Can the Sp5der Hoodie be worn in different seasonsYes, it can be used in multiple seasons depending on layering and weather conditions.How should the Sp5der Hoodie be cared forWash with similar colors, avoid harsh cleaning methods, and air dry to maintain fabric condition and shape.

R
Root
May 08, 2026 • 114 Reads

Smart Embroidery Digitizing Services for Better Stitch Control

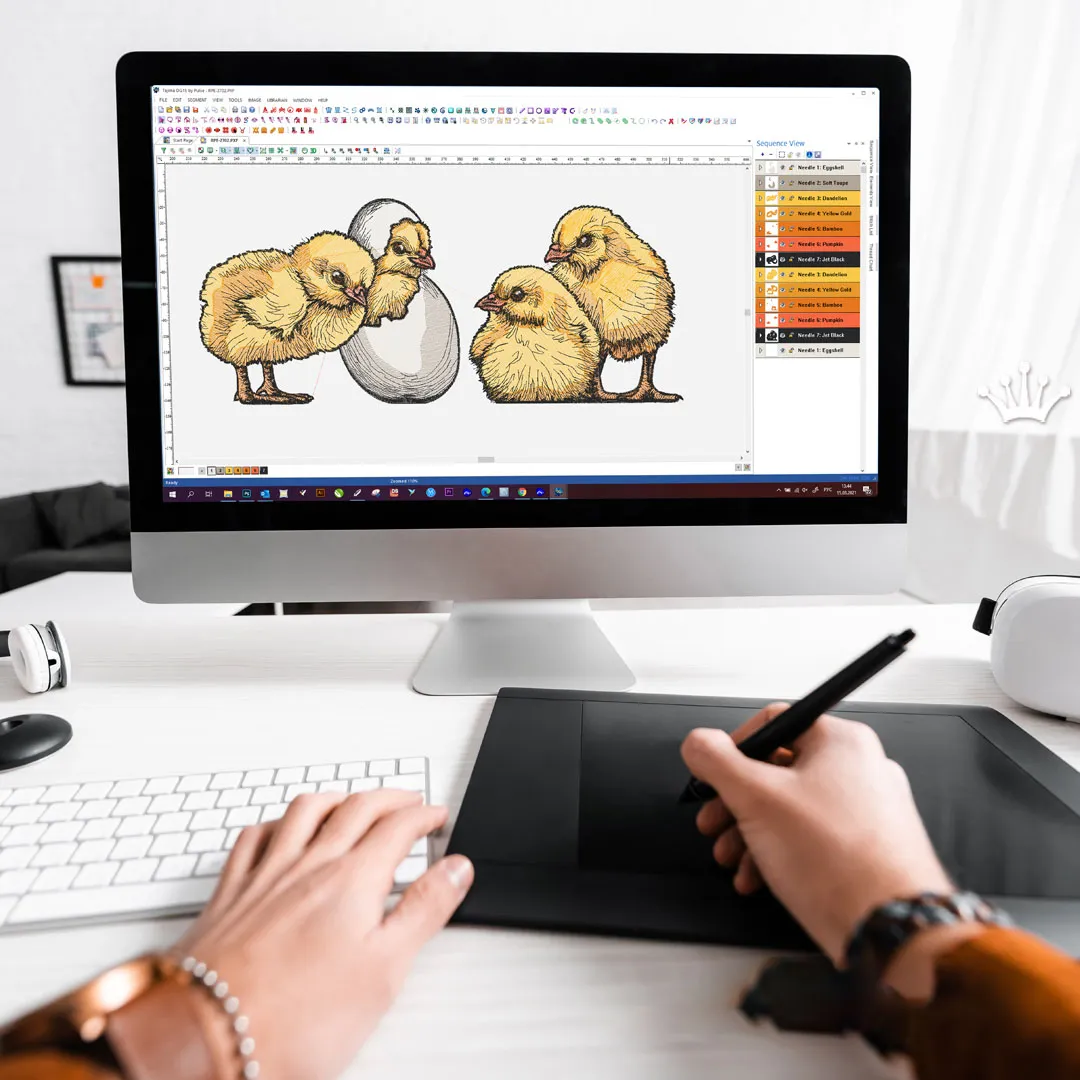
Introduction: Why Your Embroidery Still Looks Like a Science Experiment Gone WrongYou have a decent machine. You bought good thread. You watched a few YouTube videos. But every time you run a design, something goes wrong. The fabric puckers. The thread snaps. The letters come out crooked. Or worse, the whole design sinks into the material like a stone in mud. Here is the thing most people figure out the hard way: your machine is only half the equation. The other half is the digitizing. You can run a $20,000 multi-needle Tajima, but if the digitizing is bad, the output is bad. That is where professional Embroidery Digitizing Services come into play. A smart digitizing service does not just trace your logo and call it a day. They build stitch control into the file from the ground up. This guide walks you through what smart digitizing actually means, how to spot a good service from a bad one, and why paying a little more upfront saves you a mountain of frustration later.What Exactly is Smart Digitizing? (It is Not Just Tracing)Let me clear up a common misunderstanding. Digitizing is not the same as auto-tracing. Auto-tracing is what happens when you drop a JPG into cheap software and hit a button labeled "convert." The software looks at the image, guesses where the edges are, and spits out a stitch file. That file almost always stinks. It has wrong stitch angles, zero pull compensation, and no underlay. It is like giving someone a map with half the roads missing.Smart digitizing, on the other hand, is a human-driven process. A real person with embroidery experience looks at your logo and makes deliberate decisions. Where should the stitch angle go to reduce fabric pull? Which areas need a satin stitch versus a tatami fill? How much pull compensation does this specific fabric require? Should the underlay be a center run or a zigzag? These are not decisions a computer can make automatically. Smart digitizing services employ humans who understand thread tension, fabric behavior, and machine limits. They build stitch control into every single region of your design.The Real Cost of Bad Digitizing (It is Higher Than You Think)I see people chase the cheapest digitizing service they can find. Five dollars per logo? Sounds like a steal. Until you run the design. Thread breaks on the third color change. You waste twenty minutes rethreading the machine. The satin stitches have gaps so wide you can see the fabric underneath. The fill stitches are so dense that the needle actually heats up and melts poly thread. You trash three shirts before you give up and throw the file away.Now add up that cost. Three ruined garments at 20eachis20eachis60. Two hours of your time untangling thread and restarting the machine is easily 50ifyouvalueyourlabor.Plusthefrustrationandthedelayeddeadline.That50ifyouvalueyourlabor.Plusthefrustrationandthedelayeddeadline.That5 logo just cost you over 100.Smartdigitizingservicestypicallychargebetween100.Smartdigitizingservicestypicallychargebetween10 and 25perlogo.Forthatextra25perlogo.Forthatextra5 to $20, you get a file that runs clean the first time. No wasted garments. No wasted time. No yelling at your machine. Cheap digitizing is expensive. Smart digitizing pays for itself on the first test stitch.What to Look for in a Smart Embroidery Digitizing ServiceNot all services are created equal. Here is a checklist of what separates the pros from the amateurs.Real humans, not automated software. Any service that claims "instant conversion" or "automatic digitizing" is selling you trouble. Avoid them. Look for services that explicitly say they use manual digitizing with experienced artists.Samples of their work on fabric. A screenshot of a digital rendering means nothing. Ask to see photos of actual stitched samples on real fabric. Look for clean edges, no puckering, and smooth color transitions.Pull compensation knowledge. When you ask a service how they handle pull compensation, they should give you a confident answer. Something like, "We add 0.3mm to 0.5mm depending on fabric type and stitch angle." If they look confused or say "what is pull compensation?" run the other way.Fabric-specific digitizing. Smart services ask what fabric you plan to stitch on. Pique polo shirts need different underlay than denim jackets. Stretchy knits need less density than stable wovens. A service that does not ask about fabric is not a smart service.Underlay strategy. They should explain how they use edge run underlay for fill areas and center run underlay for satin columns. Underlay is not optional, and a good service treats it as a core part of the design.Reasonable turnaround. Two to four business days is standard for quality work. Same-day digitizing usually means shortcuts and automation.Free test stitch review. Many good services offer a free review of your test stitch. You send them a photo of your stitched sample, and they suggest adjustments. That is a sign of confidence.The Stitch Control Features That Actually MatterLet me break down the specific stitch control elements that smart digitizing services build into your file. These are the details that separate a flawless stitch-out from a frustrating mess.Stitch angle planning. A smart digitizer never lets all stitches run in the same direction. That creates fabric pull and visible lines. Instead, they map angles so stitches run perpendicular to the shape's longest edge. For text, they use 45-degree angles to prevent gaps between letters. For circles, they use a spiral or crosshatch pattern. This small detail dramatically improves how the design lays on fabric.Pull compensation. I mentioned this earlier, but it deserves repeating. Fabric stretches and pulls under the needle. A smart digitizer builds extra width into satin stitches and fill edges to compensate. Without this, your perfect circle stitches out as a skinny oval. Your bold letters stitch out looking anorexic. Pull compensation is non-negotiable.Density control. Too many stitches per inch, and the needle heats up, thread breaks, and fabric puckers. Too few stitches, and the design looks sparse and cheap. Smart digitizing services know the sweet spot: 0.35mm to 0.45mm stitch spacing for most fabrics. They also adjust density based on fabric type. Less density for caps and foam. More density for stable fabrics like denim.Underlay layers. This is the hidden skeleton of your design. A simple center run underlay works for basic satin columns. But complex designs need edge run underlay, zigzag underlay, or even double underlay. Smart digitizers choose the right underlay for each region. They never skip it.Trims and color changes. A well-digitized file minimizes unnecessary trims. Every trim costs time and creates a potential thread break point. Smart services sequence color changes efficiently, grouping same-color regions together even if they are far apart on the design. They also add trim commands only when needed, not after every single object.Red Flags to Avoid When Choosing a Digitizing ServiceYou now know what good looks like. Let me also tell you what to run away from.Fake reviews. If every review is five stars and written in the same robotic language, be suspicious. Look for detailed reviews that mention specific fabrics or stitch outcomes.No fabric discussion. If the service never asks what you are stitching on, they are not doing real digitizing. They are running an auto-digitize script and sending whatever comes out.DST only, no other options. DST is fine, but a smart service also offers PES, EXP, PXF, or other formats. If they only do DST because "it is all the same," they lack depth.Refusal to make adjustments. Quality services offer at least one round of free adjustments. If they want to charge you again for every tiny tweak, find someone else.Too cheap. I said it before. Five dollars per logo is a trap. The math does not work. A human cannot spend an hour on your logo for five dollars and still pay rent. That five-dollar logo takes ten minutes of automated processing and zero human care.How to Prepare Your Logo for a Digitizing ServiceEven the best digitizing service needs good source material from you. Here is how to set them up for success.Send a vector file if you have one. AI, EPS, or SVG files are ideal. They contain clean paths and solid colors. No pixelation, no guessing.If you only have a raster image, send the highest resolution you can find. 300 DPI minimum. Do not send a tiny logo saved from a website footer.Include color notes. Tell them which colors are which, especially if you have specific brand colors. PMS codes or hex codes help.Explain where you plan to stitch the design. Cap front? Left chest? Jacket back? Hoop size matters. A design that fits on a hat front will look tiny on a jacket back.Mention the fabric type. Cotton, polyester, pique, fleece, denim, or cap foam. Each fabric changes the digitizing approach.The Test Stitch Ritual (Do Not Skip This)You get the digitized file back. You load it onto your machine. You are excited to see the result. Stop. Do not stitch on your final product yet. This is the rule that separates smart embroiders from frustrated ones.Hoop up a piece of cheap muslin or an old t-shirt. Use the same stabilizer and fabric weight you plan to use on the real item. Run the design. Watch it closely. Look for thread breaks, gaps, puckering, or misaligned color changes.If it looks good on muslin, run one more test on a scrap of the actual fabric type. Sometimes a design behaves fine on muslin but sinks into pique or stretches on fleece. Test again.If you see problems, take a clear photo and send it to your digitizing service. A smart service will adjust the file for free and send you a revision. This back-and-forth is normal and expected. It does not mean the service is bad. It means you are dialing in the perfect file for your specific setup.Conclusion: Stitch Control is Not a Luxury, It is a RequirementHere is the bottom line. Your embroidery machine is a precise tool. But it is only as good as the instructions you give it. Bad digitizing gives bad instructions, and no amount of machine tuning fixes that. Smart Embroidery Digitizing Services give you stitch control built into the file from the start. They plan angles. They add pull compensation. They choose the right underlay. They adjust for your specific fabric. And they stand behind their work with free adjustments.Yes, smart digitizing costs more than the rock-bottom five-dollar services. But it saves you ruined garments, wasted time, and endless frustration. One clean stitch-out on a $30 polo shirt pays for the extra cost many times over. So do yourself a favor. Find a digitizing service that asks about your fabric, sends real stitch samples, and knows what pull compensation means. Send them a clean logo. Test on scrap fabric. And enjoy the feeling of watching your machine run a full design with zero thread breaks and perfect results. That is the goal. That is smart digitizing.

A
Absolute Digitizing
May 08, 2026 • 142 Reads

Convert Photo to Embroidery Pattern: Beginner-Friendly Guide

Introduction: You Can Actually Do ThisI remember my first attempt to turn a photo into embroidery. I picked a detailed picture of my cat, loaded it into some fancy software, and got a mess of stitches that looked like a tangled hairball. I almost gave up. But then I learned the secret: you don't need to be a pro. You just need the right beginner‑friendly process. That’s exactly what I’m sharing today. Let me show you how to Convert Photo to Embroidery Pattern without losing your mind or your weekend. Grab your hoop, and let’s stitch something personal.Why Beginners Overcomplicate This (And How You Won’t)Most new embroiderers make the same mistake. They think more detail equals a better pattern. So they keep every shadow, every highlight, every tiny whisker. Then they wonder why their fabric looks like a war zone.Here’s the truth. Embroidery is not a photograph. It’s an interpretation. Think of it like a coloring book. You want clear shapes, solid areas of color, and lines thick enough to follow with a needle. When you simplify your photo, you actually make it more beautiful in thread form.So breathe. You’re not removing detail. You’re translating it into the language of fabric and floss.What You Need Before You StartLet’s keep this simple. You don’t need a sewing room full of gadgets. Here’s the basic shopping list:For hand embroidery (easier for beginners):Your photo (printed or on your phone)Fabric (plain cotton or linen works great)Embroidery hoop (any size, 6 inches is perfect to start)Embroidery floss (a few basic colors)Needle (size 5 or 7)Water soluble stabilizer or a light source for tracingScissorsFor machine embroidery (if you have an embroidery machine):Same photoEmbroidery machine with hoopEmbroidery software (free options like Ink/Stitch exist)Thread and stabilizerThat’s it. No $500 software. No digitizing degree. Just you and your willingness to try.Step 1: Pick a Photo That Plays NiceNot every photo wants to become embroidery. Start with an easy one so you don’t get frustrated. What works well? A clear portrait of a person or pet. A simple flower. A child’s drawing. A logo or symbol.What to avoid for your first try:Group photos with five peopleLandscapes with trees, clouds, and waterAnything with tiny text or fine detailsLow light, grainy photosThink big and blocky. A face against a plain wall. A single sunflower. Your cat sleeping in a beam of light. Those stitch up beautifully.Here’s my beginner challenge: take a selfie with a plain background. Crop it so your face fills most of the frame. That’s your test subject. Simple, personal, and rewarding.Step 2: Simplify With Free Tools (Takes 5 Minutes)Now we turn that photo into a pattern. You don’t need Photoshop. Use Photopea. It’s free, runs in your browser, and works just like the expensive stuff.Open Photopea. Load your photo. Then follow these three clicks:First, go to Image > Adjustments > Posterize. A slider appears. Drag it down to 5 or 6. Watch your photo turn into distinct blobs of color. That’s exactly what embroidery wants.Second, go to Filter > Stylize > Find Edges. This outlines every shape. Your photo now looks like a coloring book page. Perfect.Third, go to Image > Adjustments > Brightness/Contrast. Boost contrast to 70 or 80. This kills any remaining gray fuzziness.Save this as a new JPG or PNG. Print it out at the size you want to stitch. For a first project, aim for 4 to 6 inches wide. Anything smaller gets fiddly.If Photopea feels overwhelming, use the free Pixlr app on your phone. Same steps: posterize, find edges, boost contrast.Step 3: Trace Your Pattern Onto Fabric (Two Easy Ways)Now you have a printed pattern. Time to get it onto your fabric. Beginners love method one. Old school stitchers swear by method two. Pick your fighter.Method one: Printable stabilizer. This feels like cheating, but it’s legal. Buy Stick n Stitch or Sulky Solvy printable sheets. Load one into your regular printer. Print your simplified photo right onto the stabilizer. Peel the backing. Stick it onto your fabric like a sticker. Put it in your hoop. Stitch right through the stabilizer. When done, rinse under warm water. The stabilizer dissolves, leaving only your stitches. Magic.Method two: Light tracing. Tape your printed pattern to a bright window. Tape your fabric on top of it. The light shines through. Trace every line with a water soluble fabric pen or a soft pencil. Remove the pattern. Hoop the fabric. Done. This costs nothing but takes patience.Either way works. I recommend method one for your first try. It removes the stress of tracing accurately.Step 4: Pick Your Thread Colors Without PanicLook at your simplified photo. You see maybe five or six colors. That’s your palette. Now go to your thread stash or craft store.Hold each floss color next to the printed pattern. Does it look close? Good enough. Embroidery thread comes in hundreds of shades, but you don’t need an exact match. A slightly lighter or darker shade adds charm, not error.For a face, you typically need: skin tone, hair color, eye color, lip color, and a background color. That’s five total. For a flower: petal color, center color, leaf color, background. Simple.Don’t overthink. If you have a bright pink flower in your photo but your thread box has a medium pink, use the medium pink. No one will compare it to the original photo. They’ll just see a lovely stitched flower.Step 5: Start Stitching (The Fun Part)Hoop your fabric tight. Thread your needle. Knot the end. Now look at your traced pattern.Start with the largest area in the background. Use a simple backstitch for outlines or a satin stitch for filling. Don’t try to match the photo’s texture. Just fill each color area with straight stitches going the same direction.For faces, stitch skin areas with long, straight stitches from forehead to chin. For hair, stitch in the direction hair grows. For eyes, use small satin stitches.Keep your stitches even but not robotic. Small wobbles make hand embroidery look handmade and beautiful, not machine‑perfect.Change thread colors as you go. Finish one entire color before moving to the next. That saves you from rethreading fifty times.If you make a mistake, pull out the stitches and retry. That’s not failure. That’s learning. Every embroiderer does it.What If You Have an Embroidery Machine?Machine embroidery speeds things up, but it adds a digitizing step. You need to turn your simplified photo into a stitch file (like PES, DST, or EXP).As a beginner, don’t buy expensive software. Use Ink/Stitch. It’s free and runs inside Inkscape. Import your simplified photo. Trace each color area using the pen tool. Apply a fill stitch to each shape. Run the simulator to check for gaps. Export your machine’s file format.Or do the smart beginner thing: pay someone. Fiverr has digitizers who will turn your simplified photo into a machine file for 10to10to20. Worth every penny to skip the learning curve.Then load the file onto your machine, hoop your fabric, and press start. The machine does the rest.Beginner Mistakes That Are Totally NormalYou will make these. Everyone does. Don’t quit.Mistake one: Picking a photo that’s too small. A one‑inch face loses all detail. Fix: stitch at least 4 inches wide.Mistake two: Using all six strands of floss on tiny details. That’s like painting with a broom. Fix: separate floss. Use two strands for normal stitching, one strand for eyes and small lines.Mistake three: Pulling stitches too tight. Your fabric puckers like a raisin. Fix: keep stitches snug but not drum‑tight. Leave a little breathing room.Mistake four: Skipping the test stitch on machine. You stitch directly onto your good fabric. Something goes wrong. Fix: always test on scrap fabric first.Mistake five: Comparing your first try to Instagram. Those perfect hoops come from years of practice. Your first attempt will have charm, not perfection. Celebrate that.Best Free and Cheap Tools for BeginnersHere’s my tried‑and‑tested list for anyone starting out:Photopea (free, browser‑based): posterize, find edges, contrast. Does everything.Stick n Stitch printable sheets ($10 for 10 sheets): removes the tracing headache.DMC floss ($0.70 each): reliable, everywhere.Bamboo hoop ($5): lighter and tighter than plastic.For machine beginners: Ink/Stitch (free) + Inkscape (free). Steep but free.For paying someone to digitize: Fiverr or Etsy. Search “photo to embroidery digitizing.”You don’t need the $500 software. You really don’t.Conclusion: Your First Photo Pattern AwaitsYou just learned everything I wish someone told me before my first attempt. Pick a simple, high‑contrast photo. Posterize it down to 5 or 6 colors. Trace it onto fabric using printable stabilizer or a light window. Pick thread colors that feel close enough. Then stitch one color at a time, keeping your stitches even but not robotic.Will it look like a printed photo? No. It will look like something better. It will look like you took a memory and turned it into texture. That’s the whole point of embroidery.So stop overthinking. Pick a photo of someone you love or something that makes you smile. Follow these steps. And enjoy the quiet satisfaction of watching a picture become thread under your fingers.Your first try might not be perfect. But it will be yours. And that’s exactly where every great embroiderer starts.

A
Anna William
May 06, 2026 • 115 Reads

Stussy Sweatshirt: Global Streetwear Ranking in the UK, USA, and Australia

In the ever-evolving world of street fashion, few brands have maintained their cultural relevance and global appeal like Stüssy. Among its most iconic staples, the Stussy sweatshirt stands out as a timeless piece that continues to dominate rankings across major fashion markets such as the United Kingdom, the United States, and Australia. This article explores why Stüssy sweatshirts consistently rank high on fashion websites, how they perform in different regions, and what makes them a must-have for modern wardrobes.The Rise of Stüssy Sweatshirts in Global FashionFounded in the early 1980s, Stüssy quickly became a pioneer in streetwear culture. What began as a surf-inspired brand evolved into a global fashion powerhouse, influencing hip-hop, skate, and youth culture. The Stüssy sweatshirt, in particular, has become a symbol of effortless style—blending comfort, quality, and bold design.Its popularity isn’t accidental. Fashion ranking websites in the UK, USA, and Australia consistently place Stüssy sweatshirts among the top streetwear items due to their:Premium materials and durabilityRecognizable logo and brandingVersatile styling optionsLimited edition drops and exclusivityUSA Ranking: Streetwear Capital InfluenceThe United States remains the largest and most influential market for streetwear. In cities like Los Angeles and New York, Stüssy sweatshirts are a staple in both casual and high-fashion circles.Why Stussy ranks high in the USA:Strong cultural roots in American streetwearFrequent collaborations with designers and artistsHigh demand driven by influencers and celebritiesAvailability across top-tier online fashion retailersGoogle-indexed fashion blogs and ranking platforms in the USA often list Stüssy sweatshirts in the top 10 streetwear essentials. Their SEO visibility is boosted by consistent search demand for keywords like “Stussy crewneck,” “Stüssy hoodie,” and “authentic streetwear USA.”UK Ranking: Minimalism Meets Urban StyleIn the United Kingdom, fashion leans toward a blend of minimalism and edgy urban aesthetics. Stüssy sweatshirts fit perfectly into this landscape, offering understated yet impactful designs.UK market highlights:High ranking on streetwear-focused websitesPopular among youth culture and university studentsStrong presence in London’s fashion sceneFrequently featured in seasonal fashion editorialsUK-based Google indexing platforms favor Stüssy due to its consistent branding and high-quality backlinks from fashion blogs and eCommerce stores. Keywords like “Stüssy sweatshirt UK” and “buy Stüssy London” contribute to its strong ranking performance.Australia Ranking: Casual Lifestyle AppealAustralia’s fashion scene is heavily influenced by comfort and lifestyle. With its surf and skate heritage, Stüssy naturally resonates with Australian consumers.Why Stüssy dominates in Australia:Aligns with relaxed, beach-inspired fashionWidely available through local and global retailersজনপ্রিয় among both men and womenStrong seasonal demand, especially in cooler monthsAustralian fashion ranking websites often highlight Stüssy sweatshirts as top-tier casual wear. Google indexing performance is driven by localized keywords such as “Stüssy Australia,” “streetwear Sydney,” and “best sweatshirts AU.”SEO and Google Indexing PowerOne of the key reasons Stüssy sweatshirts rank so well globally is their strong SEO presence. Fashion websites targeting UK, USA, and Australian audiences optimize content using high-volume keywords and structured data.Effective SEO strategies include:Keyword optimization (e.g., “Stüssy sweatshirt sale USA”)Mobile-friendly website designFast loading speedsHigh-quality backlinks from fashion blogsRegular content updates and product listingsGoogle favors authoritative and relevant content. Since Stüssy is a well-established brand, websites featuring its products benefit from higher trust signals and improved indexing.Design and Quality: What Sets Stüssy ApartStüssy sweatshirts are not just about branding—they deliver on quality and design. Most pieces are made from heavyweight cotton blends, ensuring durability and comfort.Key design features:Iconic handwritten logoClean silhouettes and relaxed fitsNeutral and bold color palettesSeasonal graphics and limited dropsThese elements make Stüssy sweatshirts versatile enough to be styled with jeans, cargo pants, or even layered under jackets for a more elevated look.Popular Styles in Global RankingsAcross fashion websites in the UK, USA, and Australia, several Stüssy sweatshirt styles consistently rank high:Classic Logo Crewneck – A timeless piece with minimal branding8 Ball Sweatshirt – A bold graphic favoriteStock Logo Hoodie – محبوب for everyday wearTie-Dye and Washed Styles – Trending among younger audiencesThese styles are frequently searched and indexed by Google, making them highly visible in organic search results.How to Choose the Right Stüssy SweatshirtWhen selecting a Stüssy sweatshirt, consider the following:Fit: Oversized vs. regularColor: Neutral tones for versatility, bold colors for statement looksMaterial: Look for heavyweight cotton for durabilityAuthenticity: Purchase from trusted retailers to avoid counterfeitsFAQs1. Are Stüssy sweatshirts worth the price? Yes, they offer a strong balance of quality, design, and brand value, making them a worthwhile investment.2. How do Stüssy sweatshirts rank globally? They consistently rank among the top streetwear items on fashion websites in the UK, USA, and Australia.3. Are Stüssy sweatshirts unisex? Most designs are unisex and suitable for all genders.4. How can I verify authenticity? Check labels, stitching quality, and buy from authorized retailers or official websites.5. Do Stüssy sweatshirts shrink after washing? Minimal shrinkage occurs if washed according to care instructions (cold wash, air dry recommended).Final ThoughtsThe Stüssy sweatshirt is more than just a piece of clothing—it’s a global fashion statement. Its consistent top rankings across UK, USA, and Australian fashion websites highlight its enduring appeal and SEO strength. Whether you’re building a streetwear wardrobe or looking for a reliable everyday essential, Stüssy continues to set the benchmark in modern fashion.By combining heritage, quality, and digital visibility, Stüssy sweatshirts remain a dominant force in the global fashion ranking landscape—proving that true style never goes out of fashion.

g
gadaf
May 06, 2026 • 107 Reads

Sp5der shorts have exploded onto the streetwear scene

Sp5der shorts have exploded onto the streetwear scene, blending bold graphics with everyday comfort to dominate urban fashion in the UK, USA, and Australia. Founded by rapper Young Stoner Life's Young Nudy (Jeffery Lamar Williams) in 2019 and elevated to full brand status in 2024, Sp5der offers Los Angeles-based designs rooted in Atlanta's hip-hop culture.Brand OriginsSp5der emerged from the hype of limited drops and celebrity endorsements, quickly becoming a staple for streetwear enthusiasts. The brand's signature web motifs, star prints, and puff-logo embroidery turn simple shorts into statement pieces that reflect urban individuality. Operating from official sites like sp5der.co.com and uk-sp5der.com, Sp5der ensures authenticity with worldwide shipping, processing orders in 24 hours and delivering in 5-7 days.Design FeaturesThese shorts prioritize mobility and style with breathable, durable fabrics suited for city life or casual hangs. Intricate spiderweb patterns and bold graphics set them apart, while functional pockets and relaxed fits pair seamlessly with hoodies or tees. Available in casual and sporty silhouettes, they merge loungewear ease with high-fashion edge, making them versatile for summer festivals, gym sessions, or street styling.Popularity SurgeSp5der shorts ride the wave of streetwear's global dominance, fueled by influencers and rappers showcasing limited editions. In the USA, they're a cultural phenomenon on platforms like Farfetch, with express delivery and Afterpay options boosting accessibility. UK fans gravitate to uk-sp5der.com for fast local shipping, while Australian shoppers tap into AU-specific retailers amid rising demand for premium imports.Sizing and Fit GuideSp5der shorts run true to size with a modern, slightly tapered leg for unrestricted movement—ideal for those 175cm tall opting for Small, where inseam hits around 68cm. Models often layer them under oversized tops; measure your waist and hips for precision, as fabrics stretch minimally for a secure, non-baggy feel. UK/EU sizing aligns closely with US standards, minimizing exchange hassles.Styling IdeasPair Sp5der shorts with a matching hoodie for full kit cohesion, or contrast with crisp white sneakers and a graphic tee for everyday flex. For UK street style, add a bomber jacket; USA hypebeasts layer with chains; Aussies go coastal with flip-flops and sunnies. Occasions range from park chills to club nights—their seasonal versatility shines in breathable cottons for warmer climates.UK Market InsightsIn the UK, Sp5der ranks high via sites like uk-sp5der.com, capitalizing on mobile-first SEO and fresh drops that keep engagement over three minutes. Fashion ecommerce thrives on unique descriptions over 150 words, semantic keywords like "streetwear shorts UK," and image alt-text for Google visibility—avoiding duplicate content penalties. Top rankings come from backlinks, fast loads under 2.5 seconds, and collection pages targeting "men's summer shorts."USA TrendsAmerican shoppers lead Sp5der's hype, with sp5der.co.com driving sales through exclusive releases and celebrity clout. Product pages optimized for variants (colors, sizes) capture 60-70% of traffic, using structured data and WebP images for speed. Google favors sites with buying guides on fabric care and styling, pushing Sp5der above copycat listings.Australia AppealDown under, Farfetch AU stocks Sp5der with Afterpay and free returns, aligning with local love for bold imports. SEO here emphasizes collection pages for broad terms like "men's designer shorts Australia," plus 400-word guides on fits and trends. With sustainable fabric nods, they fit Oz's casual-outdoor vibe, ranking via user signals like dwell time.Quality and CareCrafted for longevity, Sp5der uses premium blends resisting fades after washes—machine cold, air dry to preserve prints. Secure packaging and hassle-free returns build trust, with authenticity guaranteed direct from official stores. Durability matches hype, outlasting trendier rivals in the crowded apparel market.Pricing BreakdownEntry-level Sp5der shorts start at $80-120 USD, scaling with rarity—limited webs hit $150+. UK converts to £65-£100; AU around AUD 120-200, inclusive of duties. Value shines in resale potential, often doubling on hype platforms.SEO Optimization TipsFor ranking Sp5der content in UK/USA/AU Google, craft 900+ word uniques with H1s like "Best Sp5der Shorts 2026," primary keywords early, and LSI terms (e.g., "web print shorts streetwear"). Use schema for products, compress images to WebP, and build topical authority via guides—December 2025 update rewards helpful, original content over thin pages. Submit to Google Index via Search Console post-publish for quick wins.Where to BuyOfficial hubs like uk-sp5der.com/shorts/ offer fastest stock; Farfetch handles AU/UK with perks. Track drops for exclusives—worldwide shipping ensures no FOMO.Future OutlookAs streetwear evolves, Sp5der shorts lead with fresh collabs and sustainable shifts, poised for top SimilarWeb fashion rankings. Their blend of comfort, culture, and craftsmanship secures longevity across markets.

b
bapak54